Laser Line Levels & Plumb Bob Tools
Rotary 360 Degree, Auto Self-leveling, Number of Beams
Laser levels (sometimes misspelled as “lazer”) use laser beams instead of chalklines to mark plumb (vertical) and horizontal lines for hanging pictures, tiling walls, hanging wallpaper, putting up shelves, fencing: almost any home or construction site job.
There are different types of laser levels, for different budgets and requirements. The right model can save hours of work. Prices range from $20 to a few hundred dollars. Popular brands include Black & Decker (Bullseye), Strait-Line, Trimble (Spectra), Johnson, Ryobi (Airgrip), CST Berger, Checkpoint, Topcon, PLS Pacific Laser Systems, Stabila, Bosch, Leica and Stanley.
Auto Self-leveling Versus Manual Bubble Spirit Level
 Simpler and cheaper laser levels are basically laser pointers attached to a standard carpenter’s spirit or torpedo level. The device is manually leveled by adjusting its slope until the bubble in the tube of liquid is centered. Some time is saved by not having to run a chalkline, but the manual leveling takes just as long as with a non-laser device.
More sophisticated laser levels are self-leveling. The laser is allowed to swing freely inside the device, like a pendulum:
- Accuracy can be as high as 1/4 inch at 30 (sometimes up to 100) feet.
- There should be a warning (flashing laser or dotted line) if the laser is too far out of level (more than 4 to 6 degrees) and cannot self-level.
- Damped lasers will settle down more quickly. Cheaper undamped lasers will keep on swinging for a while.
- It should be possible to lock the laser to stop it from self-leveling, to mark a sloped line.
- The laser should also be lockable for storage and transportation, when the device is switched off. This reduces damage and misalignment.
Single Point, 180 Degrees, 360 Degrees and Multiway Laser Beams
 The simplest tools have 1 to 3 fixed lasers (up or down, left or right):
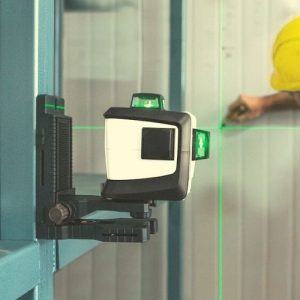
- Some are designed to be hung on the wall, with the lasers pressed up against the wall to draw a line on the wall. If the wall is uneven, the beam can be blocked after a few feet.
- Others are designed to be placed on the floor or on a tripod, shining a single vertical spot of light to align floor and ceiling tracks or baseplates.
More flexible are laser beams that scan or fan out to draw a line. The beam can form anything from 45 degree to 360 degree beams:
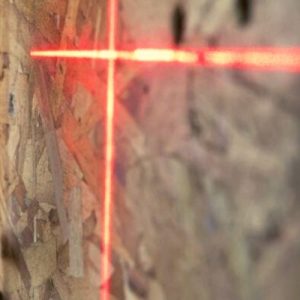
- A 360 degree beam means that a tool in the center of the room will draw a horizontal laser line on all the walls. For a vertical 360 degree beam, a line is drawn on the floor, ceiling and with plumb lines on two opposite walls.
- 180 degree beam tools are designed to give the same coverage as 360 degree tools, but only if hung on the wall.
- 45 to 90 degree beams have less coverage but are good enough for many purposes. They can be manually rotated for more coverage (except for hang-on-wall types).
Laser Level Mounting Options
The laser needs to be physically raised or lowered to move the horizontal line up or down. It isn’t possible to move the line by simply angling and pointing the beam up or down (then the beam wouldn’t be level).
Hang-on-wall lasers are commonly fixed to the wall using pins, nails or sticky tape. Any adjustment means punching another hole in the wall or peeling off more paint with the sticky tape. More advanced models have fine adjustment screws that can move the laser up/down and sideways a few inches.
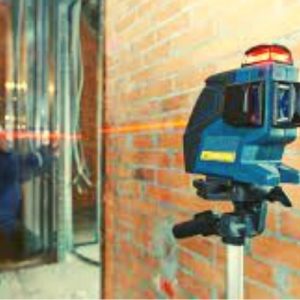
Lasers with flat bases can be placed on a shelf or a pile of books. Mounting the laser on a camera tripod which has an adjustable column is better for daily professional use. A magnetic base is a useful option.
Check Out: How to Use a Level
Laser Level Limitations
 Laser levels do have some limitations:
- The range of the laser is typically 30 to 300 feet indoors, depending on the power of the laser. The range can drop to a quarter of this when outdoors in bright light. Laser-enhancing glasses, reflectors or laser detectors are used to increase the range; or work is carried out in the early morning and late evening.
- Lower quality lasers spread out with distance, drawing lines as thick as 1/4 inches wide at 50 or 100 feet.
- Self-leveling lasers can be out of alignment by a few degrees, especially if the equipment is dropped or knocked around. A plumb bob and horizontal spirit level should be used regularly to check that the self-leveling is working correctly.
The Best Laser Level
Like a laser measure, a self-leveling laser level can save professionals hours of work while producing similar or more accurate results. The main problem is in choosing from the many different models available. Switchable 360 degree/spot models are the most flexible, but also the most expensive. For occasional DIY home use, a simple hang-on-wall tool should be sufficient.
What is a Plumb Bob?
The plumb bob might not be the most exciting or innovative tool out there, but it’s undoubtedly one of the most useful.
As with a spirit level, the primary purpose of a plumb bob is to check the alignment of various elements during construction or DIY.
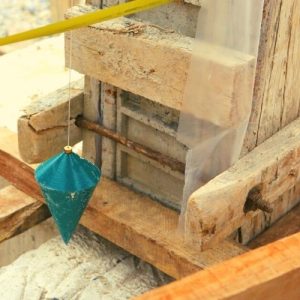
A plumb bob is a weighted object connected to a string that can be used to establish a vertical line. That weighted object can be as simple as a rock or as elaborate as the brass plumb bob shown. Some are bullet- or cone-shaped, but in the DIY world they’re often in the guise of a chalk box or chalk line.
Plumb bobs have been around a long time. Egyptians used them to build the pyramids and builders throughout the ages have used them to determine if walls are “plumb” or perfectly vertical. They’re ideal for tasks like centering lights over a kitchen island, determining the proper spacing of recessed lights or framing basement walls.
How to Use A Plumb Bob
- Measure two to three few inches away from the top of the wall and make a mark.
- Set a nail in the mark.
- Hang the plumb bob on the nail, letting gravity draw a vertical reference line for you.
- When the plumb bob is done oscillating, measure the distance from the wall. If it matches the measurement at the top of the wall, your wall is plumb.
Check Out: How to Make and use a Water Level
How to Make a Homemade Plumb Bob – 3 Simple Steps
 Need a plumb bob, but don’t have one to hand?
Don’t worry, owing to how simple they are, they’re incredibly easy to make.
So, before you go off and buy one, check out the following steps to learn how to make a homemade plumb bob in just a few minutes.
Here’s what you’ll need:
- 1x screwdriver
- 1x ring pull from drink can
- 1x length of string
Next, take the end of the piece of string and hold it against the point where you’ll be securing the plumb line once complete. The tip of the screwdriver should hang about one inch from the floor (you might need to trim the unused end of the string to allow this).
Finally, wait for the string and screwdriver to stop swinging before using them to test for plumb.


Comments are closed, but trackbacks and pingbacks are open.